
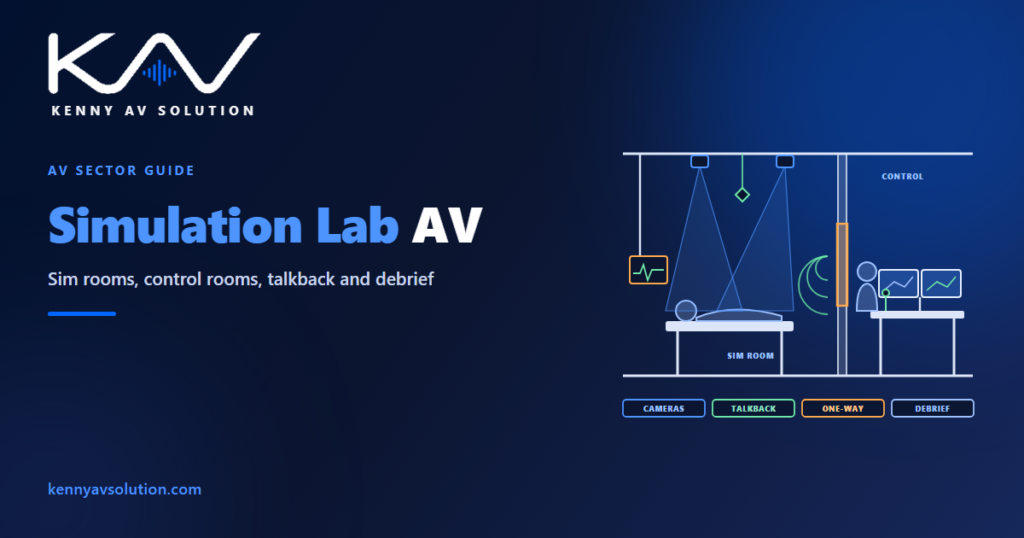
Simulation lab AV drawings document rooms where nurses, doctors and paramedics practise on a manikin while faculty watch, talk and record from next door, then replay the whole scenario to the learners in a debrief. The AV is not a presentation system bolted onto a teaching room. It is the instrument the teaching depends on: if a camera misses the patient’s face or a microphone misses what the team said at the bedside, the debrief has nothing to work with. The drawings are what make sure every camera, microphone and screen is in the right place before the ceiling closes.
Clinical layout, medical gases and the manikins themselves are designed by the medical equipment planner and the simulation equipment vendor. The recording and debrief software is usually a specialist simulation platform with its own installer, and recording consent and retention are set by the institution. Product dimensions and port counts come from manufacturer data. What follows is common practice for the AV documentation.
The sim suite is the unit of design
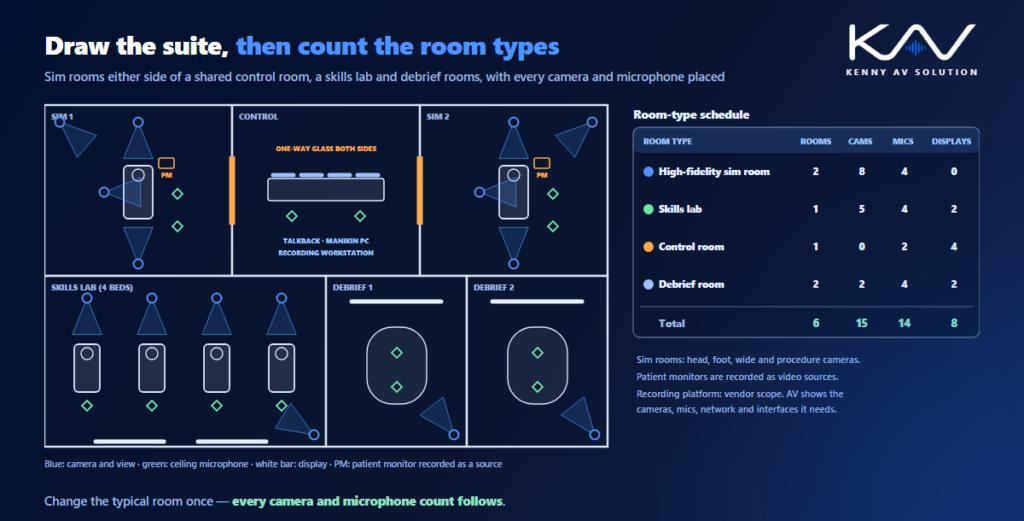
A simulation centre is built from suites, and each suite has three parts: the simulation room where the scenario runs, the control room where faculty operate the manikin and the recording, and a debrief room where the learners review what happened. Agree the room types first: a high-fidelity sim room set up as an ICU bay or operating theatre, a skills lab with several beds, a standardised patient exam room, a control room, a debrief room. Draw one typical layout for each type and place them on the floor plan, then let a room-type schedule carry the counts. This is the same discipline as a device schedule: change the typical room once and every count follows.
Cameras and microphones around the bed
The sim room is drawn around the bed, not the room. Learners need to see themselves from the angles a debrief needs: the patient’s head and airway, the whole team from the foot of the bed, a wide view of the room, and often a close view of the procedure. That usually means three or four cameras per bed, fixed or PTZ, plus ceiling microphones above the bed and the team area. Dimension camera positions against the bed head, the ceiling pendant or boom, surgical lights and anything else in the ceiling, because a light swung into place can blind a camera that looked fine on plan. Show the patient monitor output as a video source too: the vital signs screen is part of the recording. The coverage method in CCTV coverage drawings works well for checking each camera’s view.
The control room and the one-way glass
Faculty run the scenario from a control room beside the sim room, looking through one-way glass and at camera feeds on their monitors. Draw the control room as positions, like any operator room: the operator desk, the monitors, the manikin control computer, the recording workstation and the talkback panel. Then draw the window as a section: glass size and sill height against the operator’s eye line, and the lighting rule that keeps the glass one-way, a darker control room than sim room. Talkback runs both ways. The voice of the patient goes from a faculty microphone to a loudspeaker in the manikin or at the bed head, and a separate intercom lets faculty speak into the room as themselves. Sound isolation between the two rooms belongs on the plan as well, as in AV acoustics coordination, or learners will hear the faculty discussing them.
Debrief: playback, not presentation
The debrief room is where the recording earns its keep. It needs a display large enough to show several camera views and the vital signs at once, sized as in display sizing, a facilitator position that controls playback, and microphones if debriefs are recorded or shared with remote learners. Several sim rooms often feed one debrief room, and a learner group may watch a scenario live from it, so show which rooms can be routed to which debrief, live and recorded, on the signal flow. Overflow viewing in a classroom is common, and it borrows from hybrid classroom AV drawings.
The simulation platform is vendor scope
Most centres record and debrief through a specialist simulation recording platform that captures the cameras, audio, the patient monitor and the manikin’s event log on one timeline. The platform vendor designs its software and often supplies the encoders and servers. Do not draw their system for them. Do draw what they need from everyone else: camera models and IDs, network ports and addresses, server rack space, storage, and the points where AV audio and video enter their system. Name the boundary in a responsibility matrix. Recordings of learners are sensitive, so the network diagram should show where recordings are stored and who can reach them, as in AV network security.
Coordinate with the clinical fit-out
A sim room is a real clinical room in miniature: bed head panels, medical gas outlets that may be live or simulated, ceiling pendants, monitors on arms, curtains and sometimes a compressor for the manikin. The AV drawings have to work around all of it. Show camera and microphone positions on the reflected ceiling plan with the pendant and light positions from the medical equipment planner, put AV wall boxes where they will not sit behind a headwall or a monitor arm, and give the manikin its power, network and air connections at the bed. The wider rules in healthcare AV drawings apply, and one room ID used on the plan, the camera labels and the recording system, following AV cable labeling, keeps faculty and support staff talking about the same camera.
Frequently asked questions
What do simulation lab AV drawings include? Typical layouts for each room type (sim room, skills lab, exam room, control room and debrief room), camera and microphone positions on the plan and reflected ceiling plan, control room positions and a window section, talkback and intercom, signal flow from every sim room to its debrief rooms, rack elevations and a room-type schedule.
How many cameras does a simulation room need? Usually three or four per bed: a view of the patient’s head and airway, the team from the foot of the bed, a wide room view and a close view of the procedure. The patient monitor output is recorded as an extra video source.
How does the voice of the patient work? A faculty member in the control room speaks into a microphone that feeds a loudspeaker inside the manikin or at the bed head, so learners hear the patient. A separate intercom lets faculty speak into the room as themselves.
Who designs the simulation recording system? Usually a specialist simulation platform vendor designs the recording and debrief software and often supplies its encoders and servers. The AV drawings show the cameras, microphones, network, rack space and interfaces it needs, and the responsibility matrix names the vendor’s scope.
Why does the control room need its own acoustic and lighting details? Learners must not hear faculty discussing them, so the wall between the rooms needs sound isolation, and the one-way glass only works if the control room is kept darker than the sim room.
Need simulation lab AV drawings?
Kenny AV Solution drafts AV documentation for integrators, consultants and design-build teams worldwide — typical sim room, control room and debrief layouts, camera and microphone plans, reflected ceiling plans, window sections, signal flow, rack elevations and room-type schedules for simulation centres and skills labs, all drawn to your standards and your title block. See our drafting services, get an existing set checked with a drawing set review, or schedule a quick call — we come back with a quote and timeline within one business day.